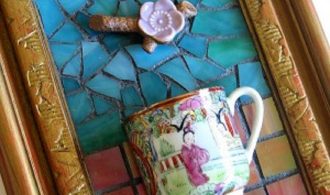
Mosaic art tiles are all-purpose medium with several possibilities because you can design a lamp, decorate a table, create a wall décor or embellish a floor. Look all around you for creative design ideas including works of art, photographs, magazines and even aquariums will help you coin new artistic plans. Once you have decided what to create, you can visit craft stores to find tile pieces with variety of colors that will suit your tastes and preferences. Below are the ideas you can attend to begin designing your own mosaic art:
1. You must sketch what design you want to go with. Use pencil and a marker. The surface can be a table top, flat plaster board, wood panel or glass globe. You can also work from a premade design. Transfer a design onto the surface by tracing over the image on paper with a graphite pencil, and then place the image over a piece of carbon paper on the surface, and trace over again with the graphite.
2. You have to use a ruler or other straight edge and measure out evenly spaced tic marks, horizontally and vertically, for a grid. You must use pencil to draw out straight lines against the straight edge.
3. Choose what tile colors you want for your design. Depending on whether you are using glass tile or mosaic tile, use the glass nippers or mosaic tile nippers to cut the tile into shapes that will precisely fit any irregular shapes in the design including as leaves or fins.
4. Put on latex gloves, and place a dab of adhesive on the back of each tile just before laying it down. Use an adhesive appropriate for the surface you are using. Lay the tile for irregular shapes first. Then lay any square tile into the grid, one color at a time, to arrange an evenly spaced pattern. Use the tweezers to shift tile that moves out of place. Cut the tile surrounding the irregular shapes with nippers. This step is saved for last so that irregular shapes are clearly visible. Allow the adhesive to dry overnight.
5. You have to mix 1/2 cup of grout with water at a ratio of about seven to one, or a tablespoon at a time until the consistency is thick and creamy. Gently spread the grout over the tile with the grout spreader tool to make sure that all crevices are filled. Spread the grout in one direction across the entire pieces and then spread in a perpendicular direction to fill the crevices extensively.
6. Let the grout dry for 15 minutes and then wipe excess from the surface with a sponge dampened with cool water. Let the grout to dry overnight. Use tile and grout sealer to prevent moisture damage and yellowing.
Mosaic and More is founded on the idea that anyone is capable of an artistic mosaic creation. Our charter is to provide mosaic kits at all levels of skill in a wide variety of themes, welcoming creative craft makers of all types. Thank you for for interest in Mosaic and More.

